


There is a lot of reasons to subscripe for a VPS. Maybe you need to host your own website using this VPS
or hosting your own VPN. It could be used for a lot of uncountable staff.
What is a VPS ?
VPS stands for Virtual Private Server.
In layman’s terms, a server is a powerful computer that stores all of the data and files that make up your website. When someone types your domain name into their web browser, that powerful computer “serves up” your website to the searcher’s screen.
Now for the virtual aspect: VPS uses virtualization technology to split that one powerful server we just talked about into multiple virtual servers. Think of it this way: it’s one piece of physical hardware that functions like several separate servers.
The word private means just what it implies. Your virtual server is reserved for you, so you won’t have to share RAM, CPU, or any data with other users.
Create new VPS
In this example I will use my google clould account to buy this VPS. It's pretty much the same for a lot of vps providors.
In the Google Cloud Console, go to the VM instances page.
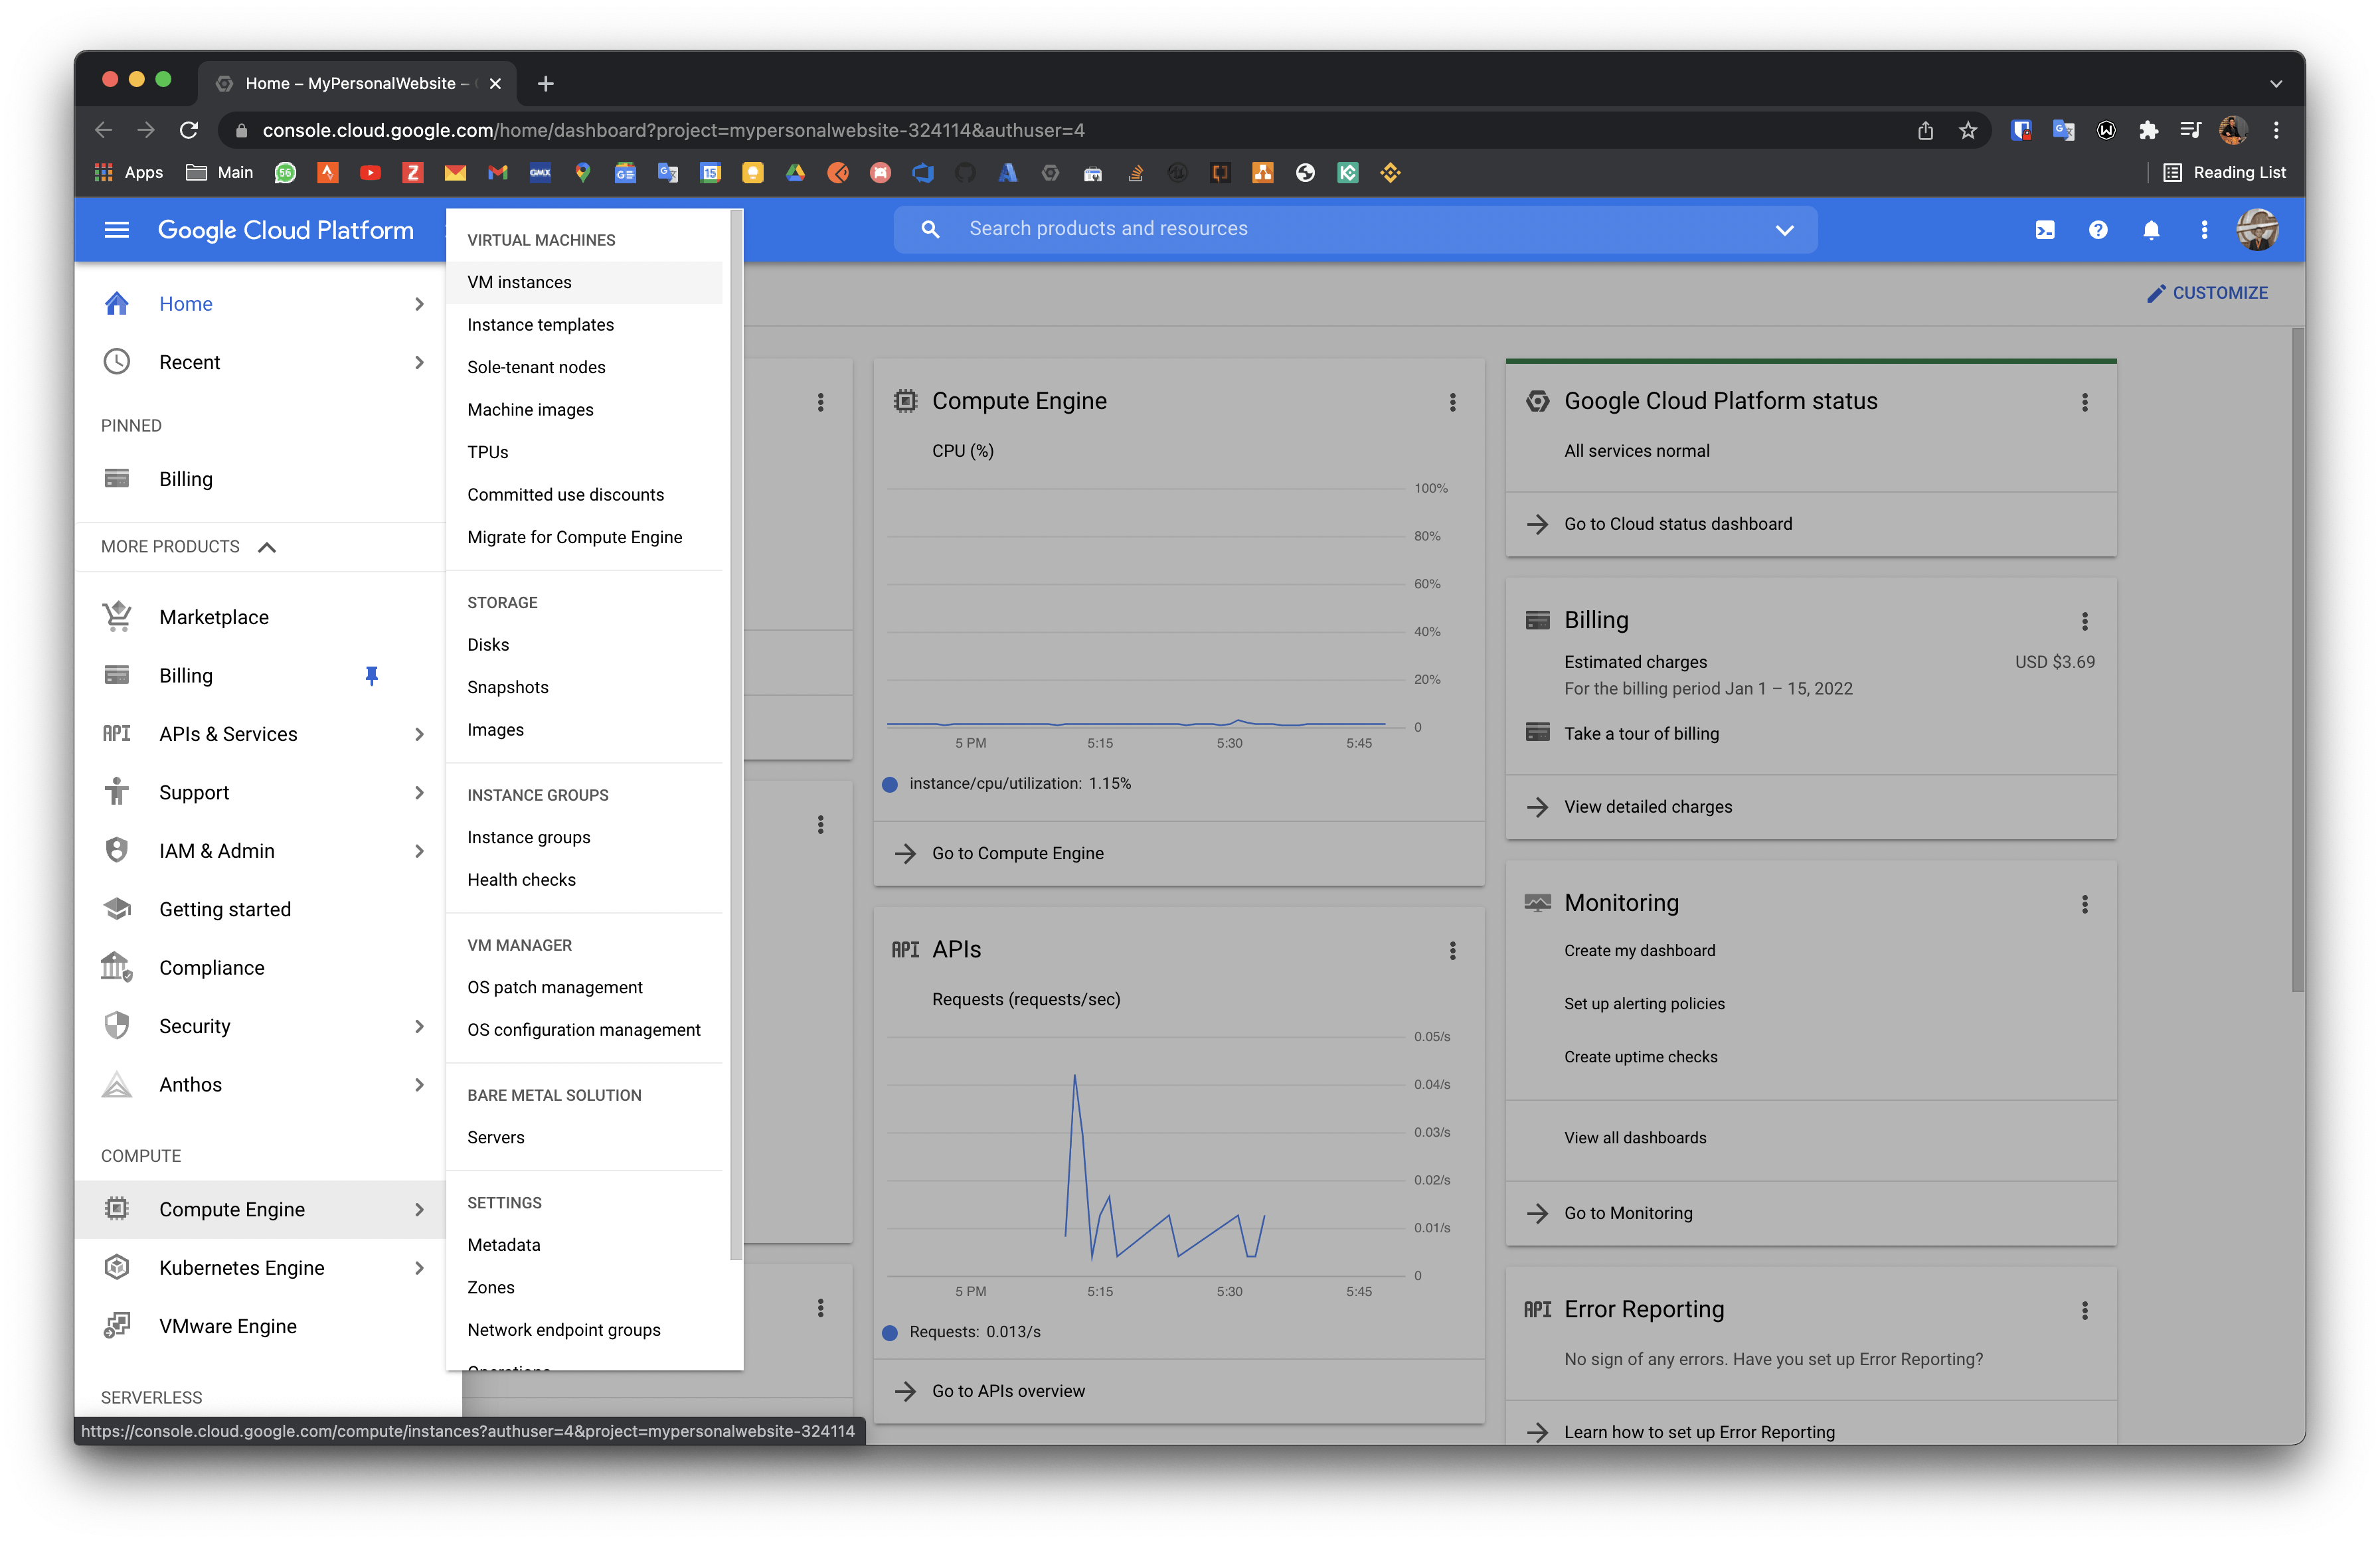
- Click Create instance.

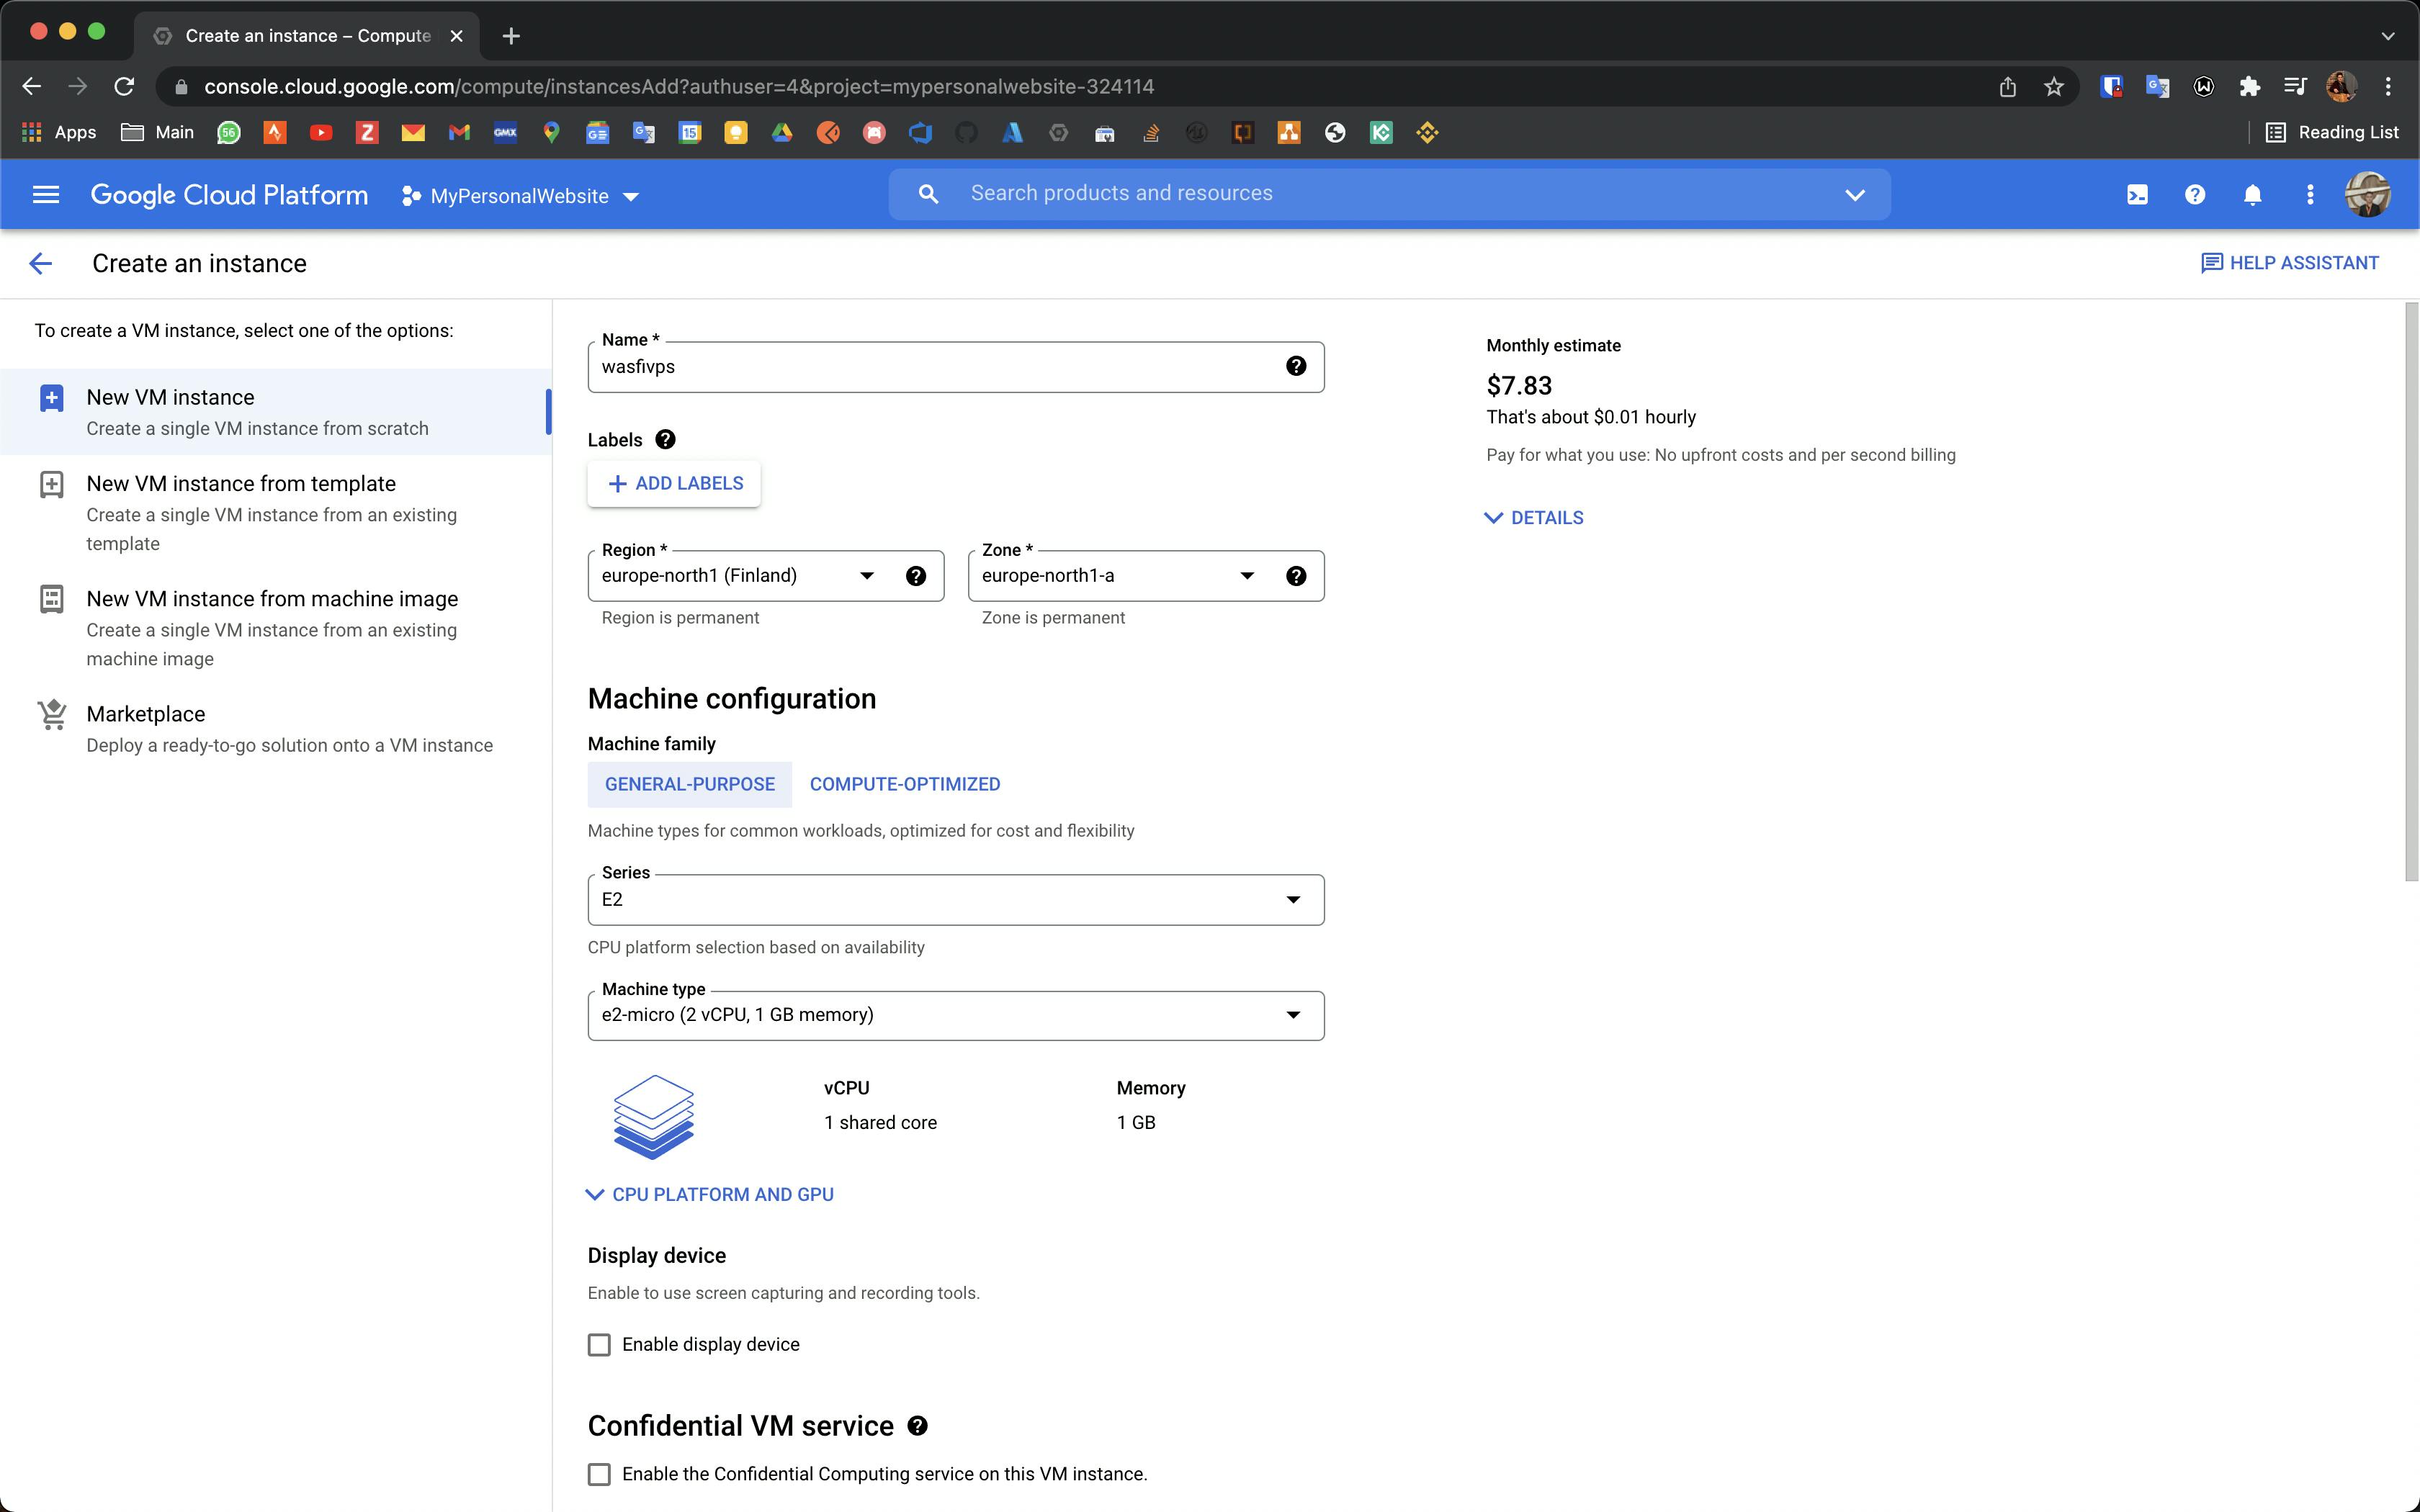
- Specify a Name for your VM
3.Change the Zone for this VM. Try to choose the clossest zone to you and your customers
- Select a Machine configuration for your VM.
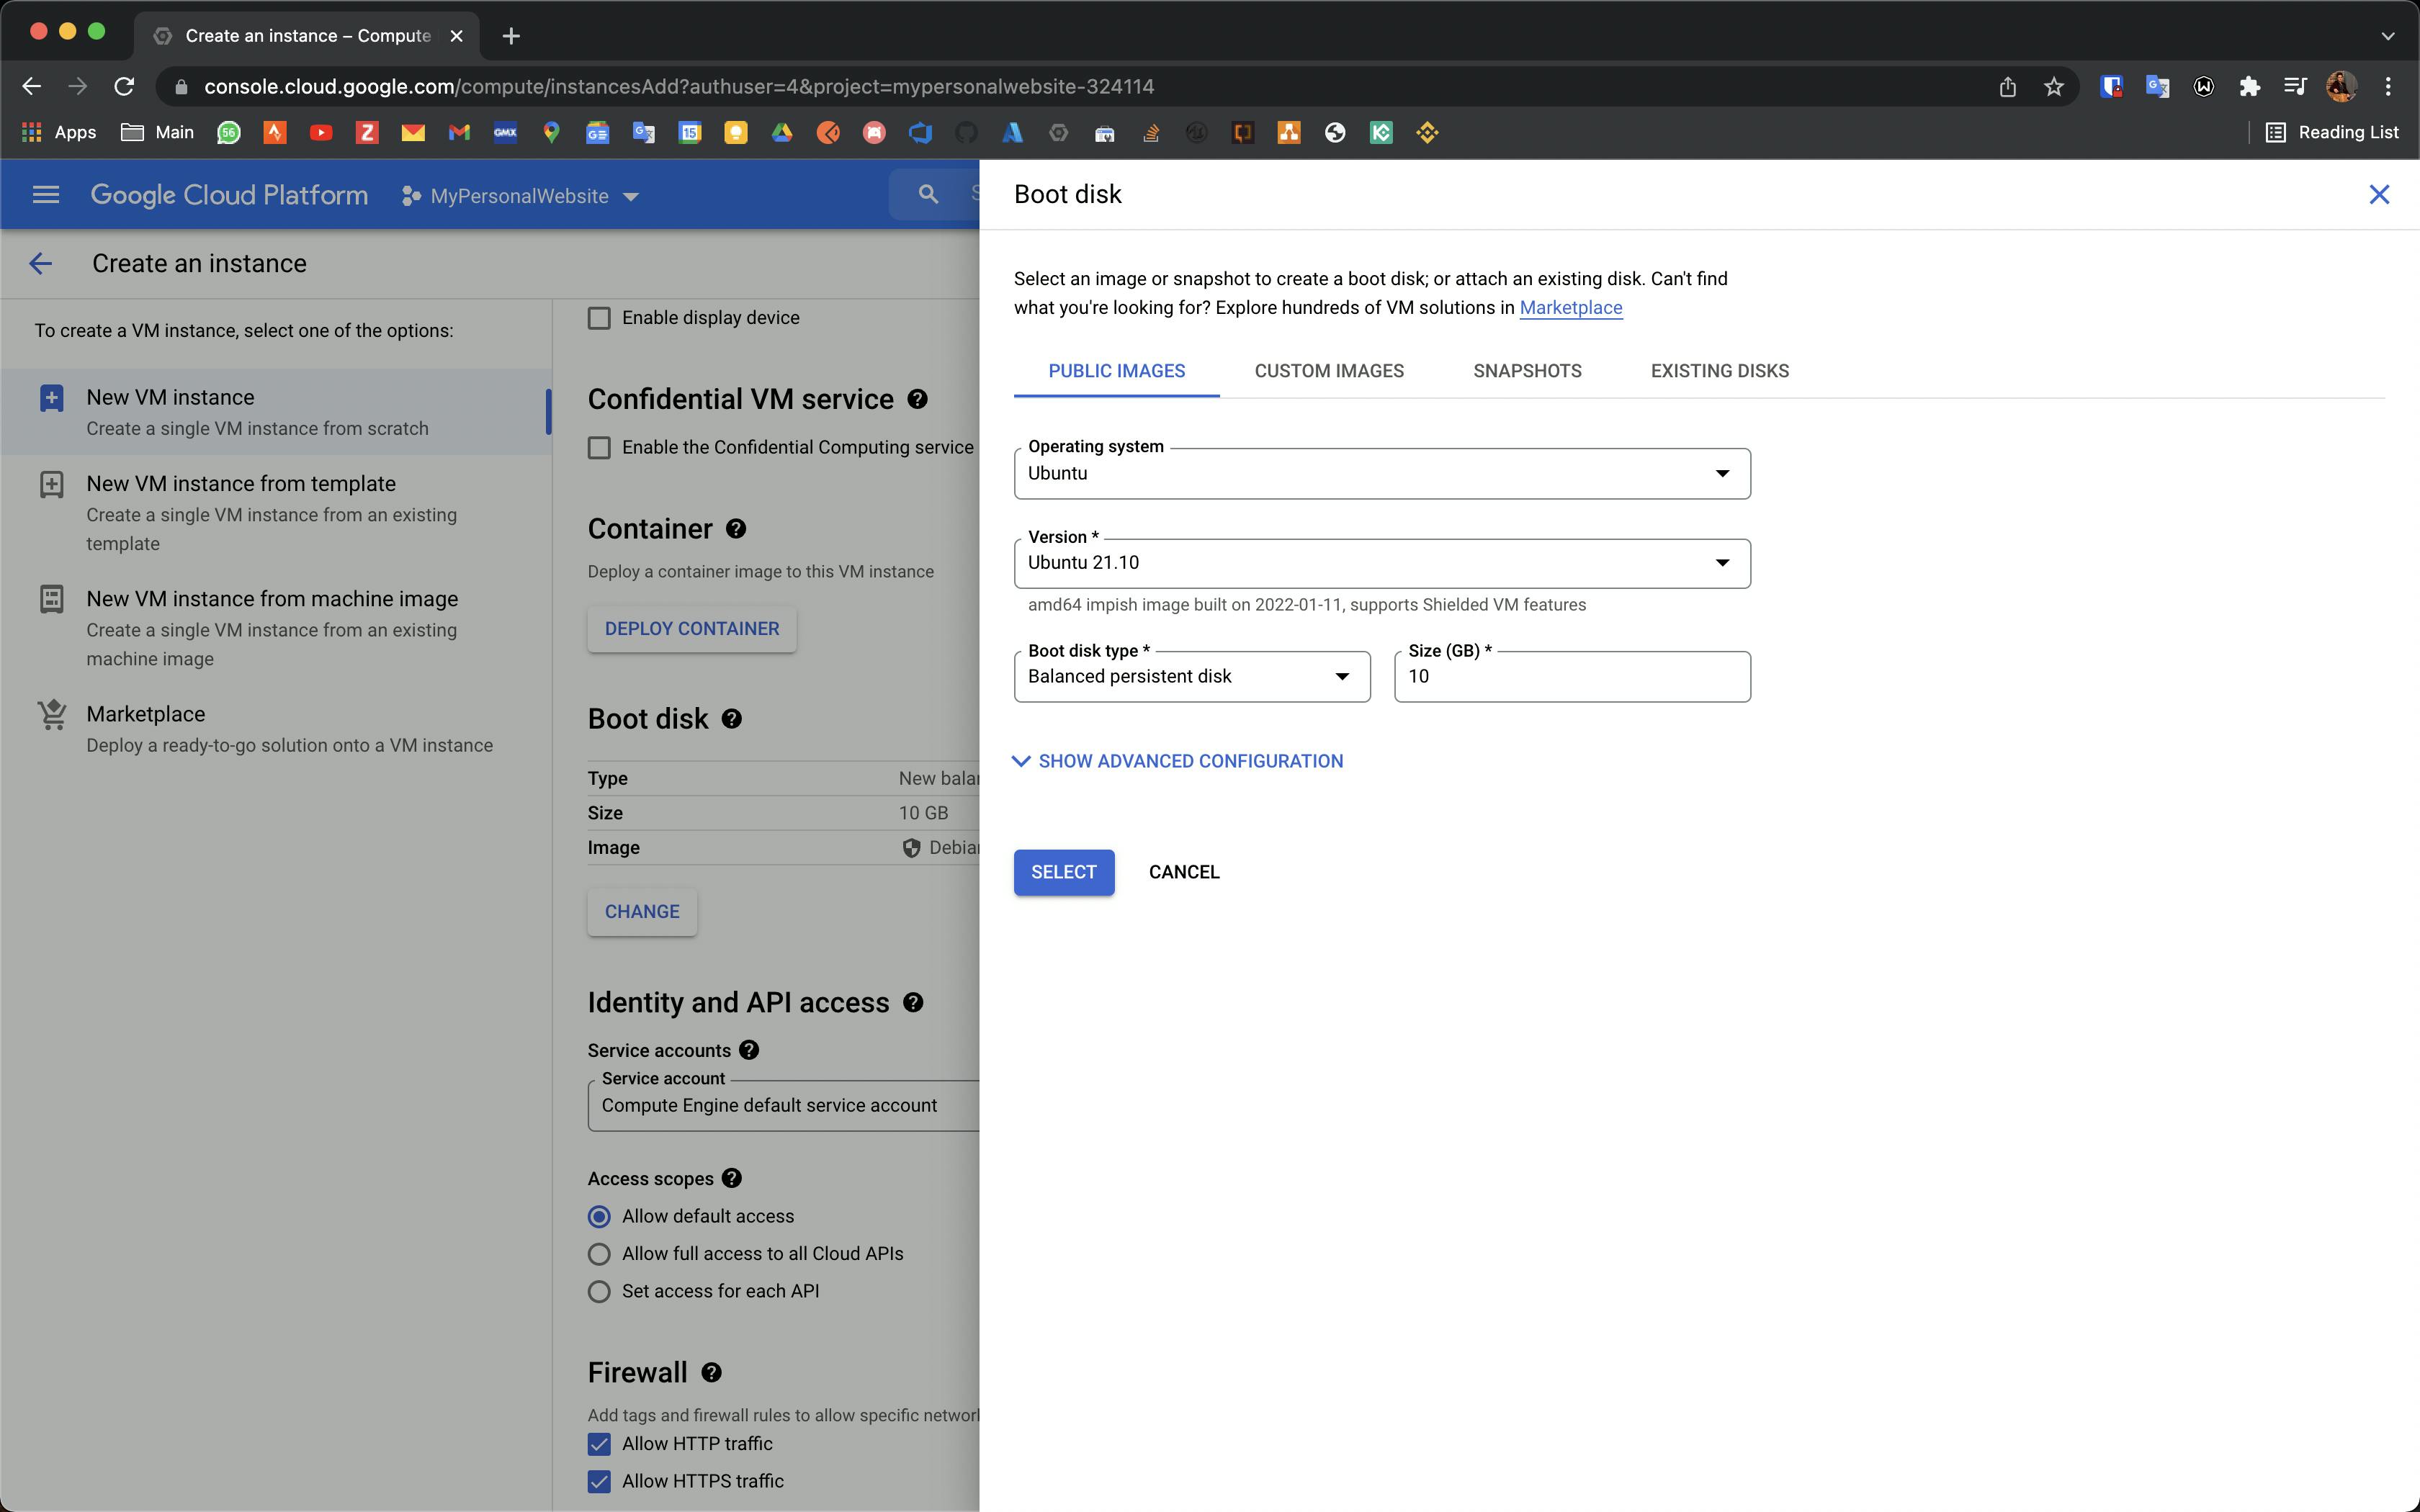
- Selecting the disk configurations and the operating system that you want to be pre installed on your VPS.
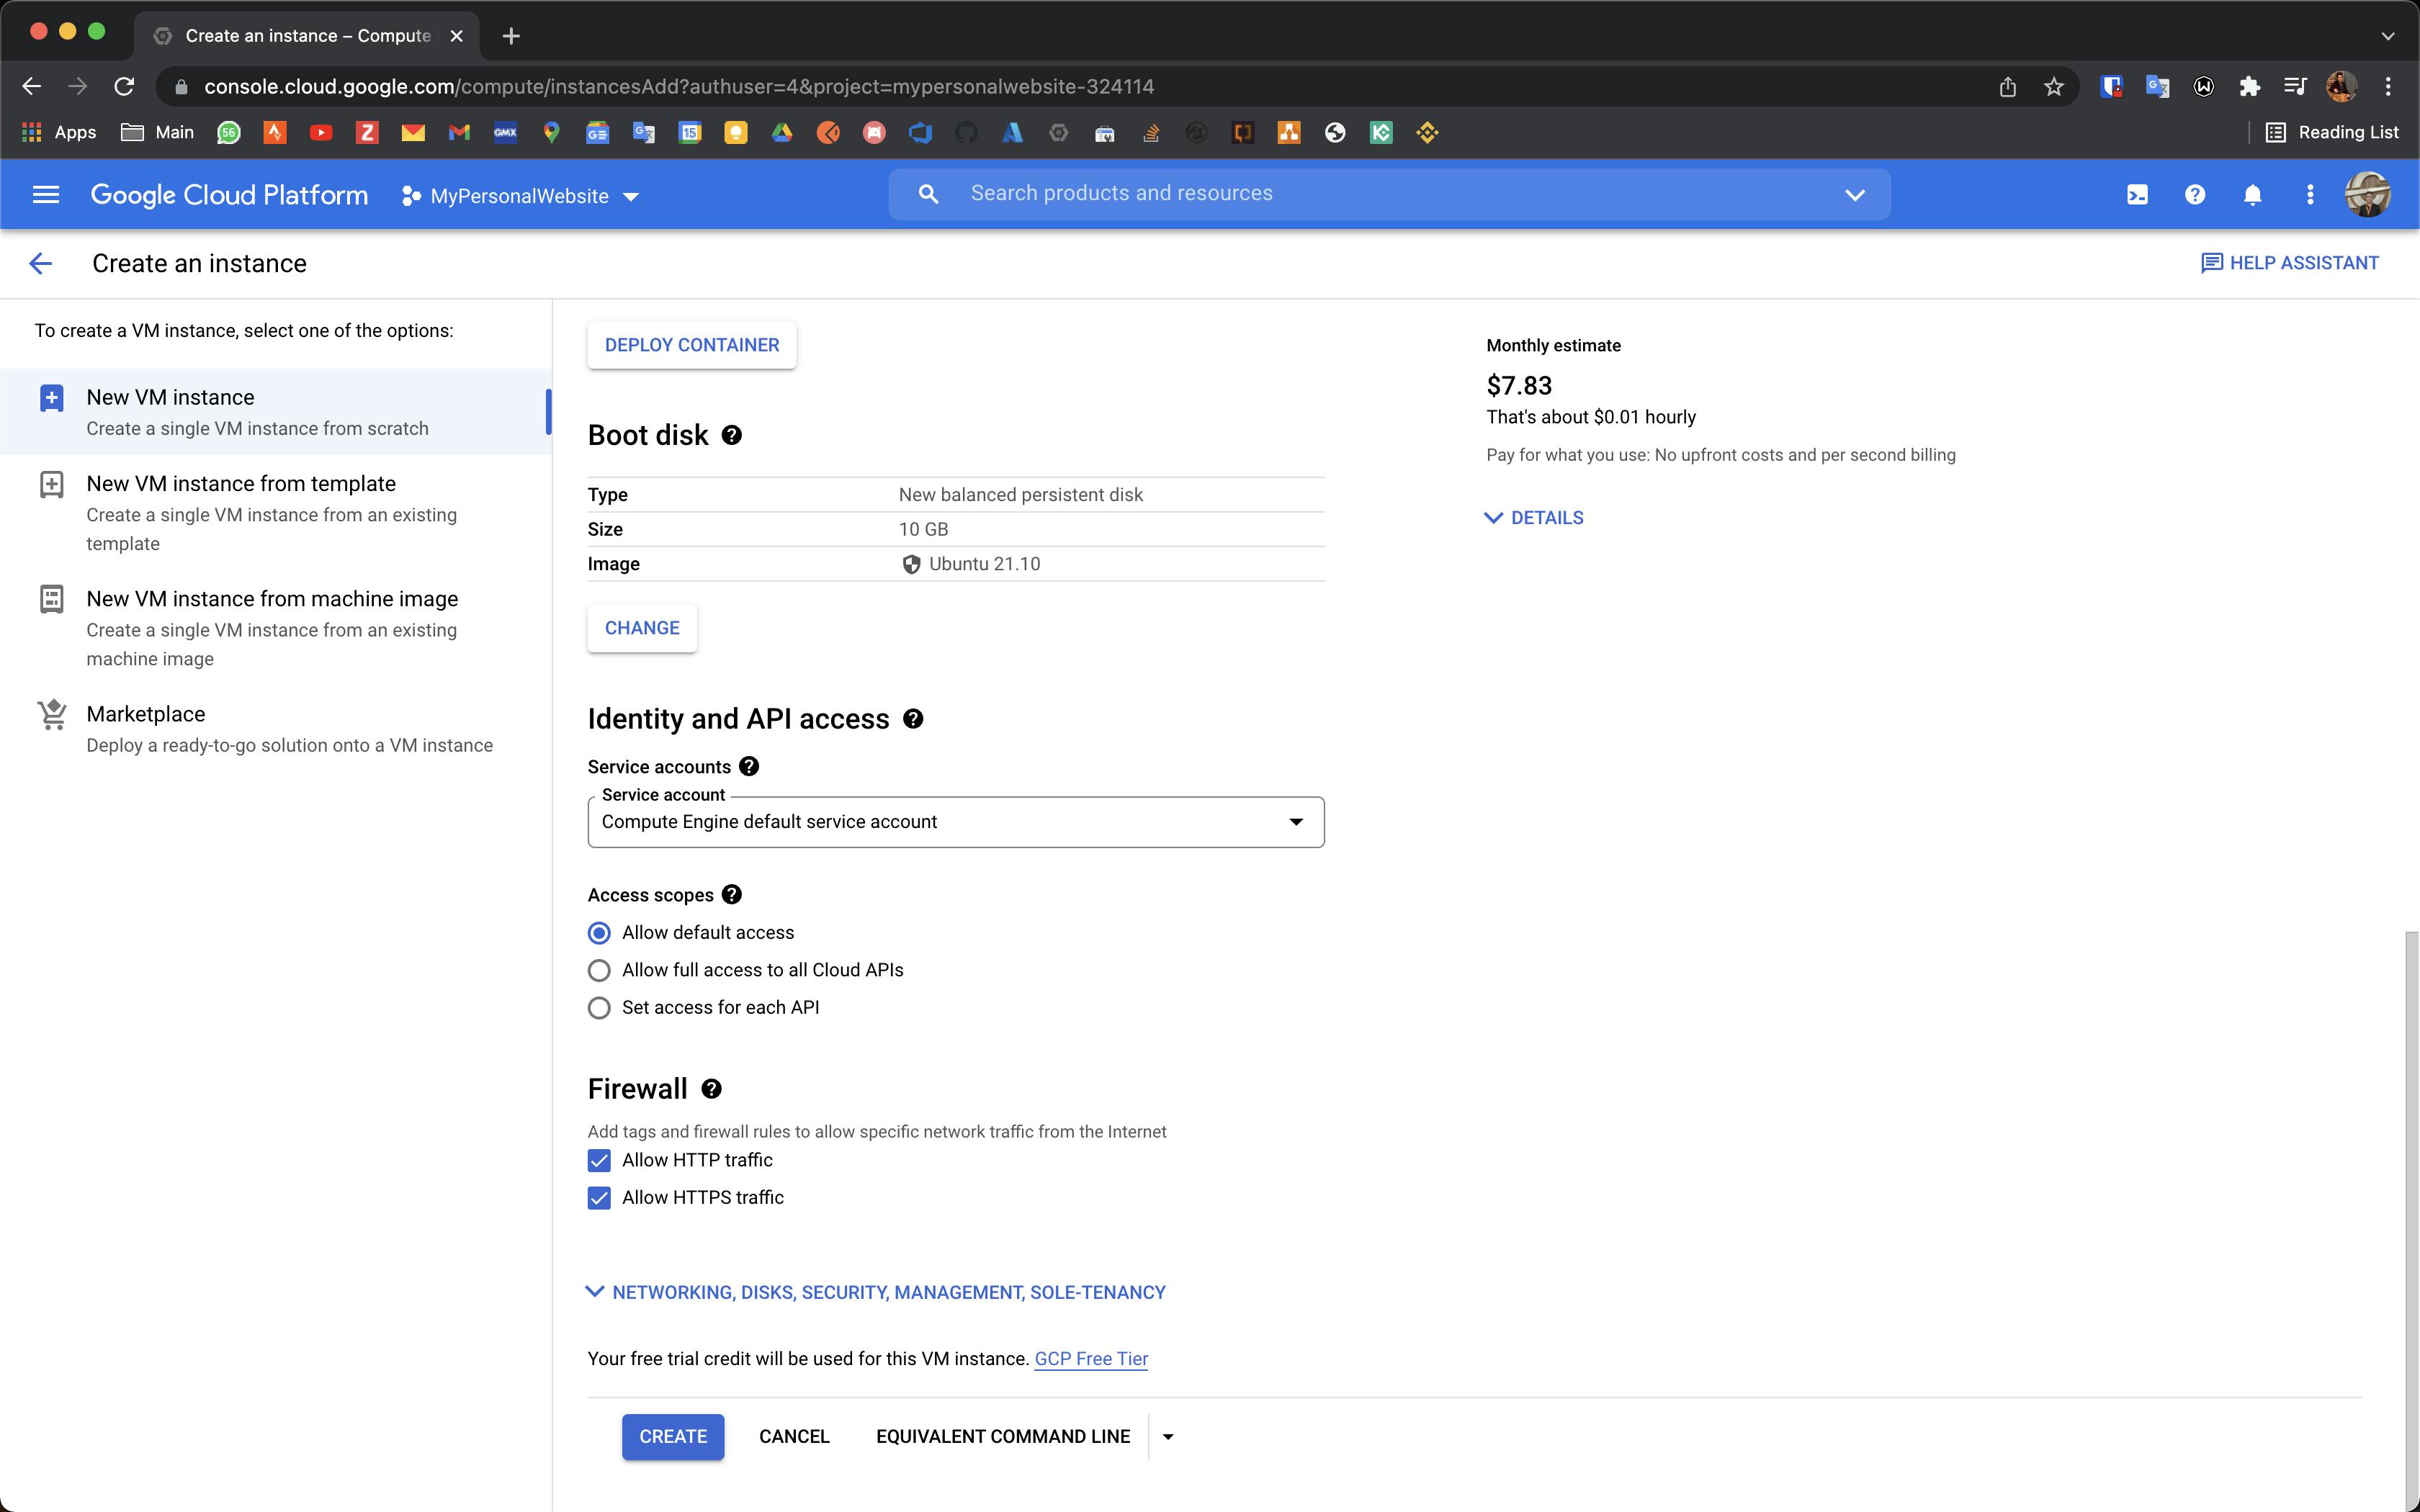
In the Firewall section, to permit HTTP or HTTPS traffic to the VM, select Allow HTTP traffic or Allow HTTPS traffic. When you select one of these, Compute Engine adds a network tag to your VM, which associates the firewall rule with the VM. Then, Compute Engine creates the corresponding ingress firewall rule that allows all incoming traffic on tcp:80 (HTTP) or tcp:443 (HTTPS).
Click create and congratulations. Your new VPS has been created.
- Connect to your VPS via SSH

Now you 've created your own vps and you can controll it via SSH.